Grid Style Greetings is a design method for creating a gift-able personalized illustration.

Creating a personalized illustration for a friend or family member is a wonderful way to celebrate that person and let them know how important they are in your life. It shows that you pay attention to the things they like and appreciate them.
I’ve been creating personalized illustrations for friends and family for several years and find that this grid format helps me organize a variety of elements into one illustration. Your illustration will make a great gift and the entire time you are creating it you are thinking about the recipient which makes it double fun. It’s also a lovely way to share your creativity!
Start thinking about who you want to honor with your next illustration!
This design method works with any technique or medium. Your finished illustration can be created with colored pencils, watercolor, acrylics, cut paper, stencils, or digitally. It’s all about how you craft your idea and design your page.
9 Steps to a Grid Style Greeting!

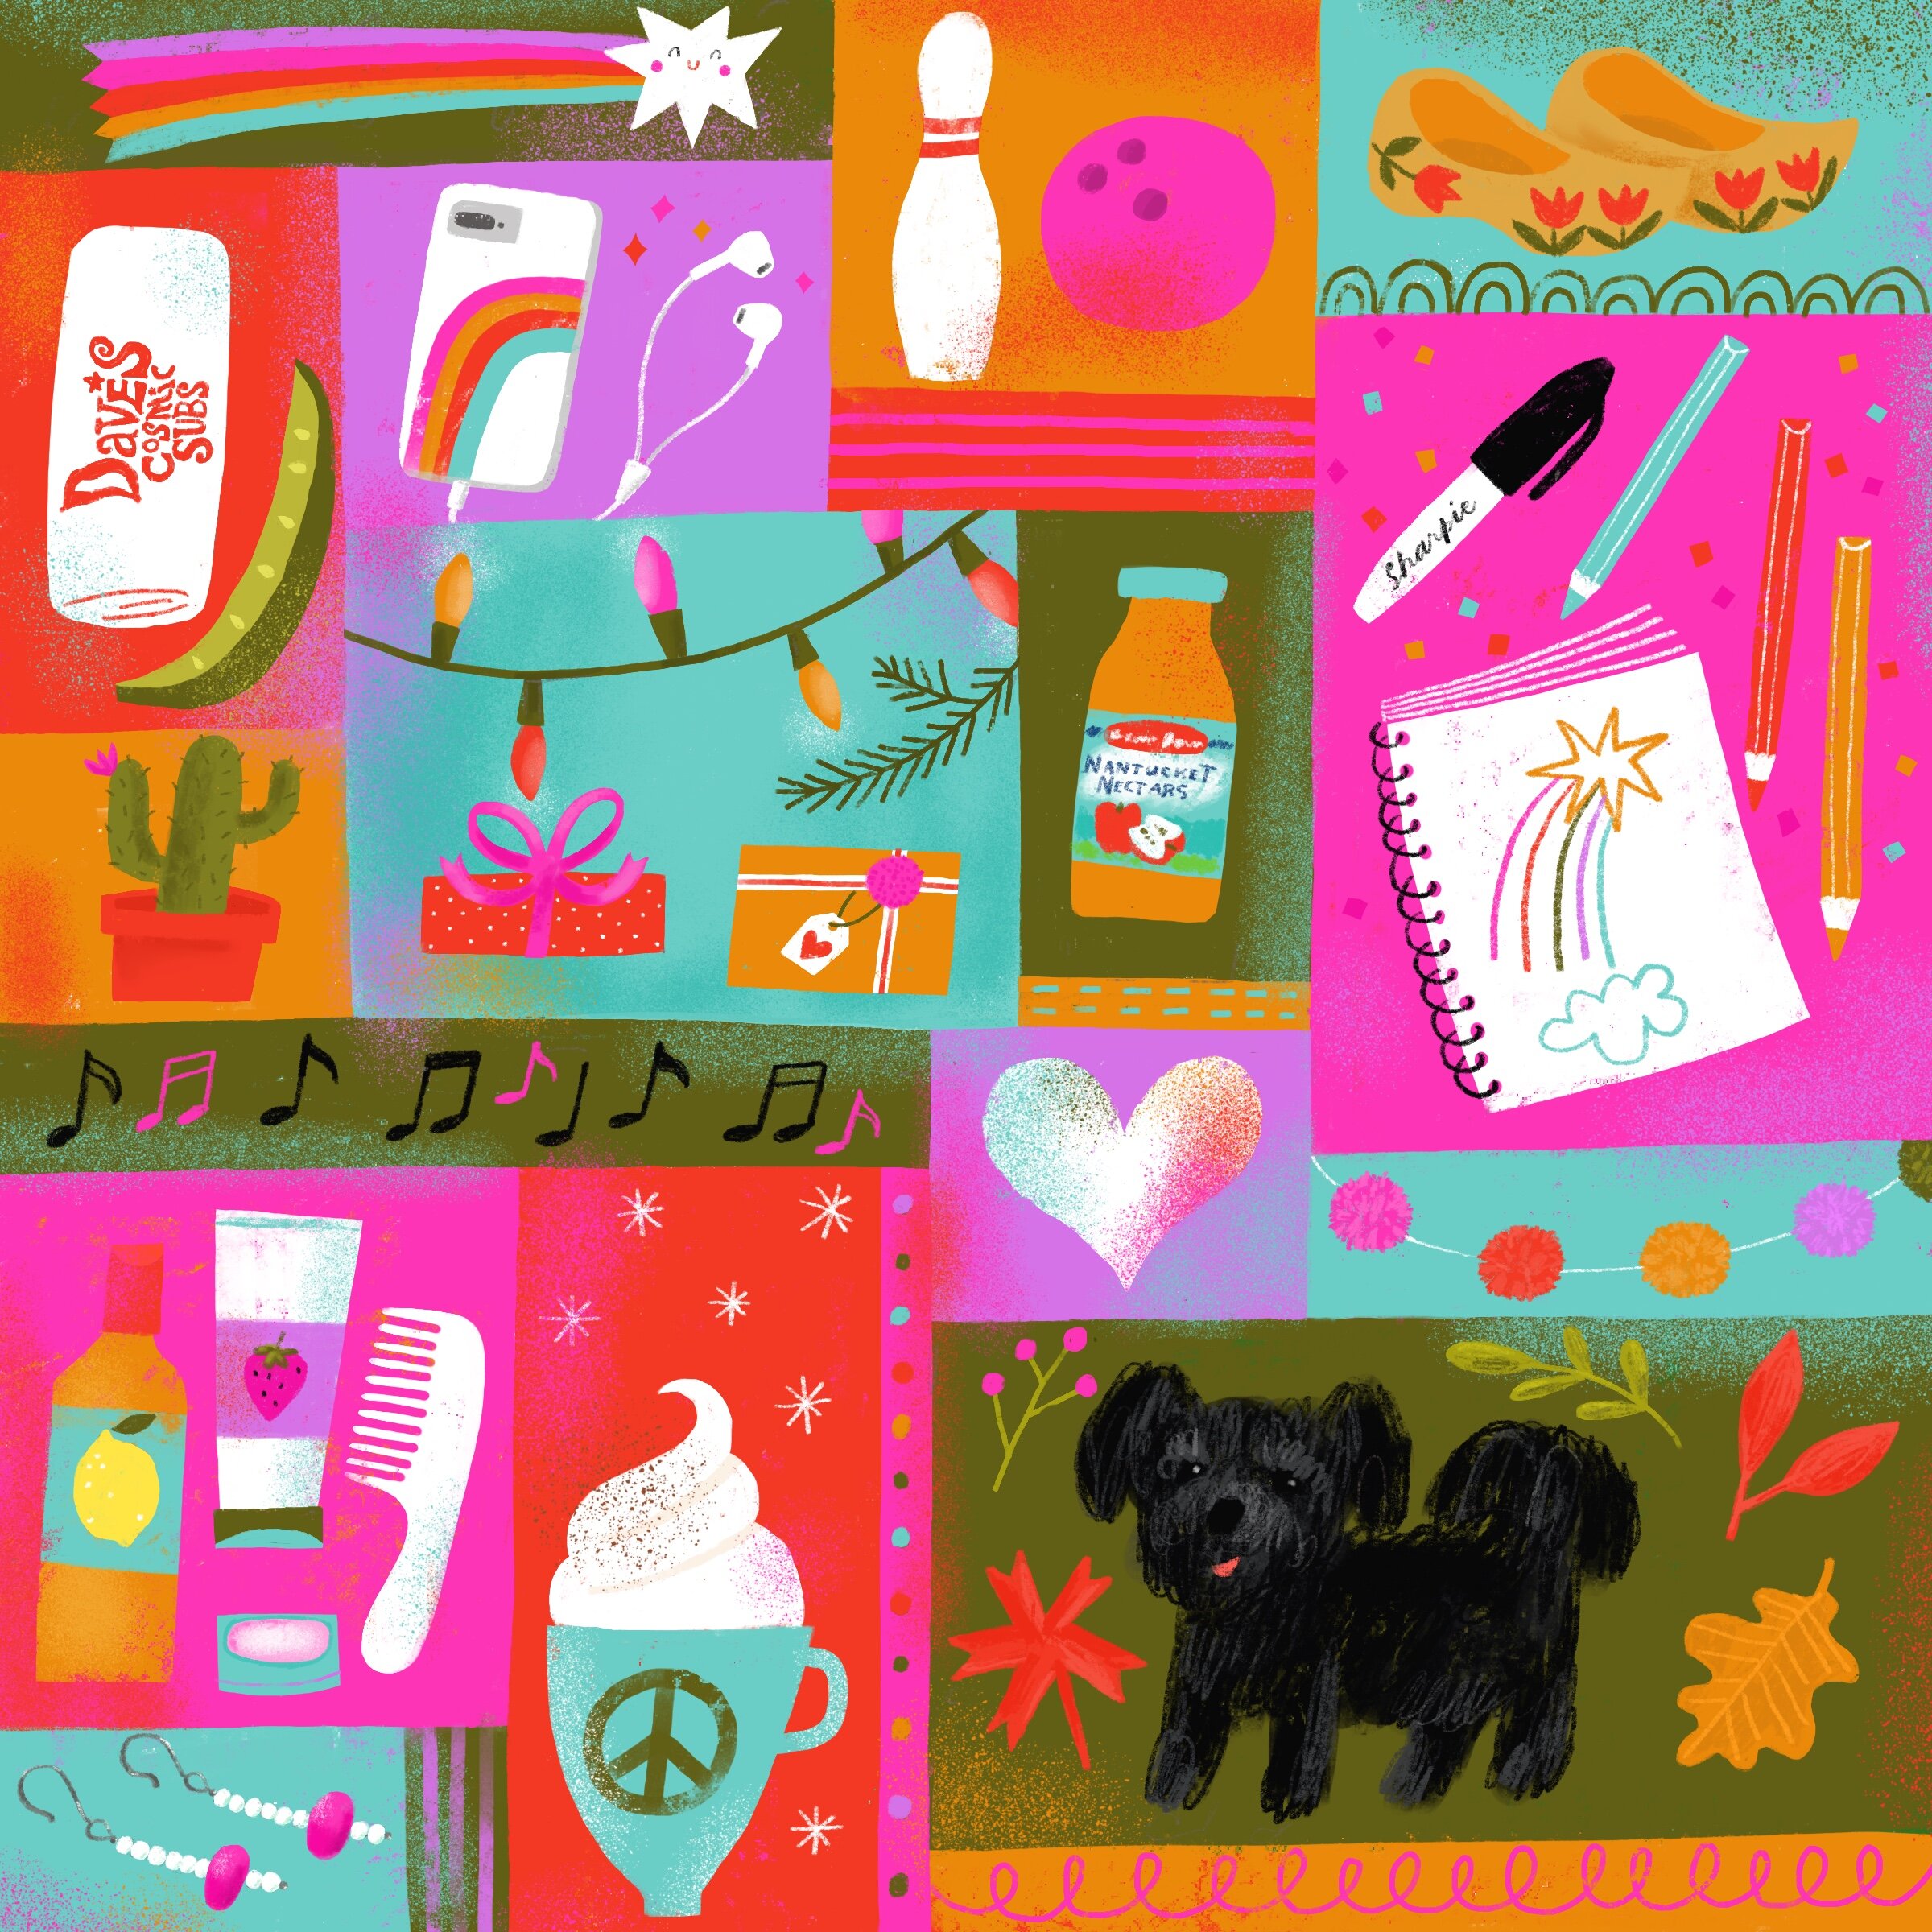
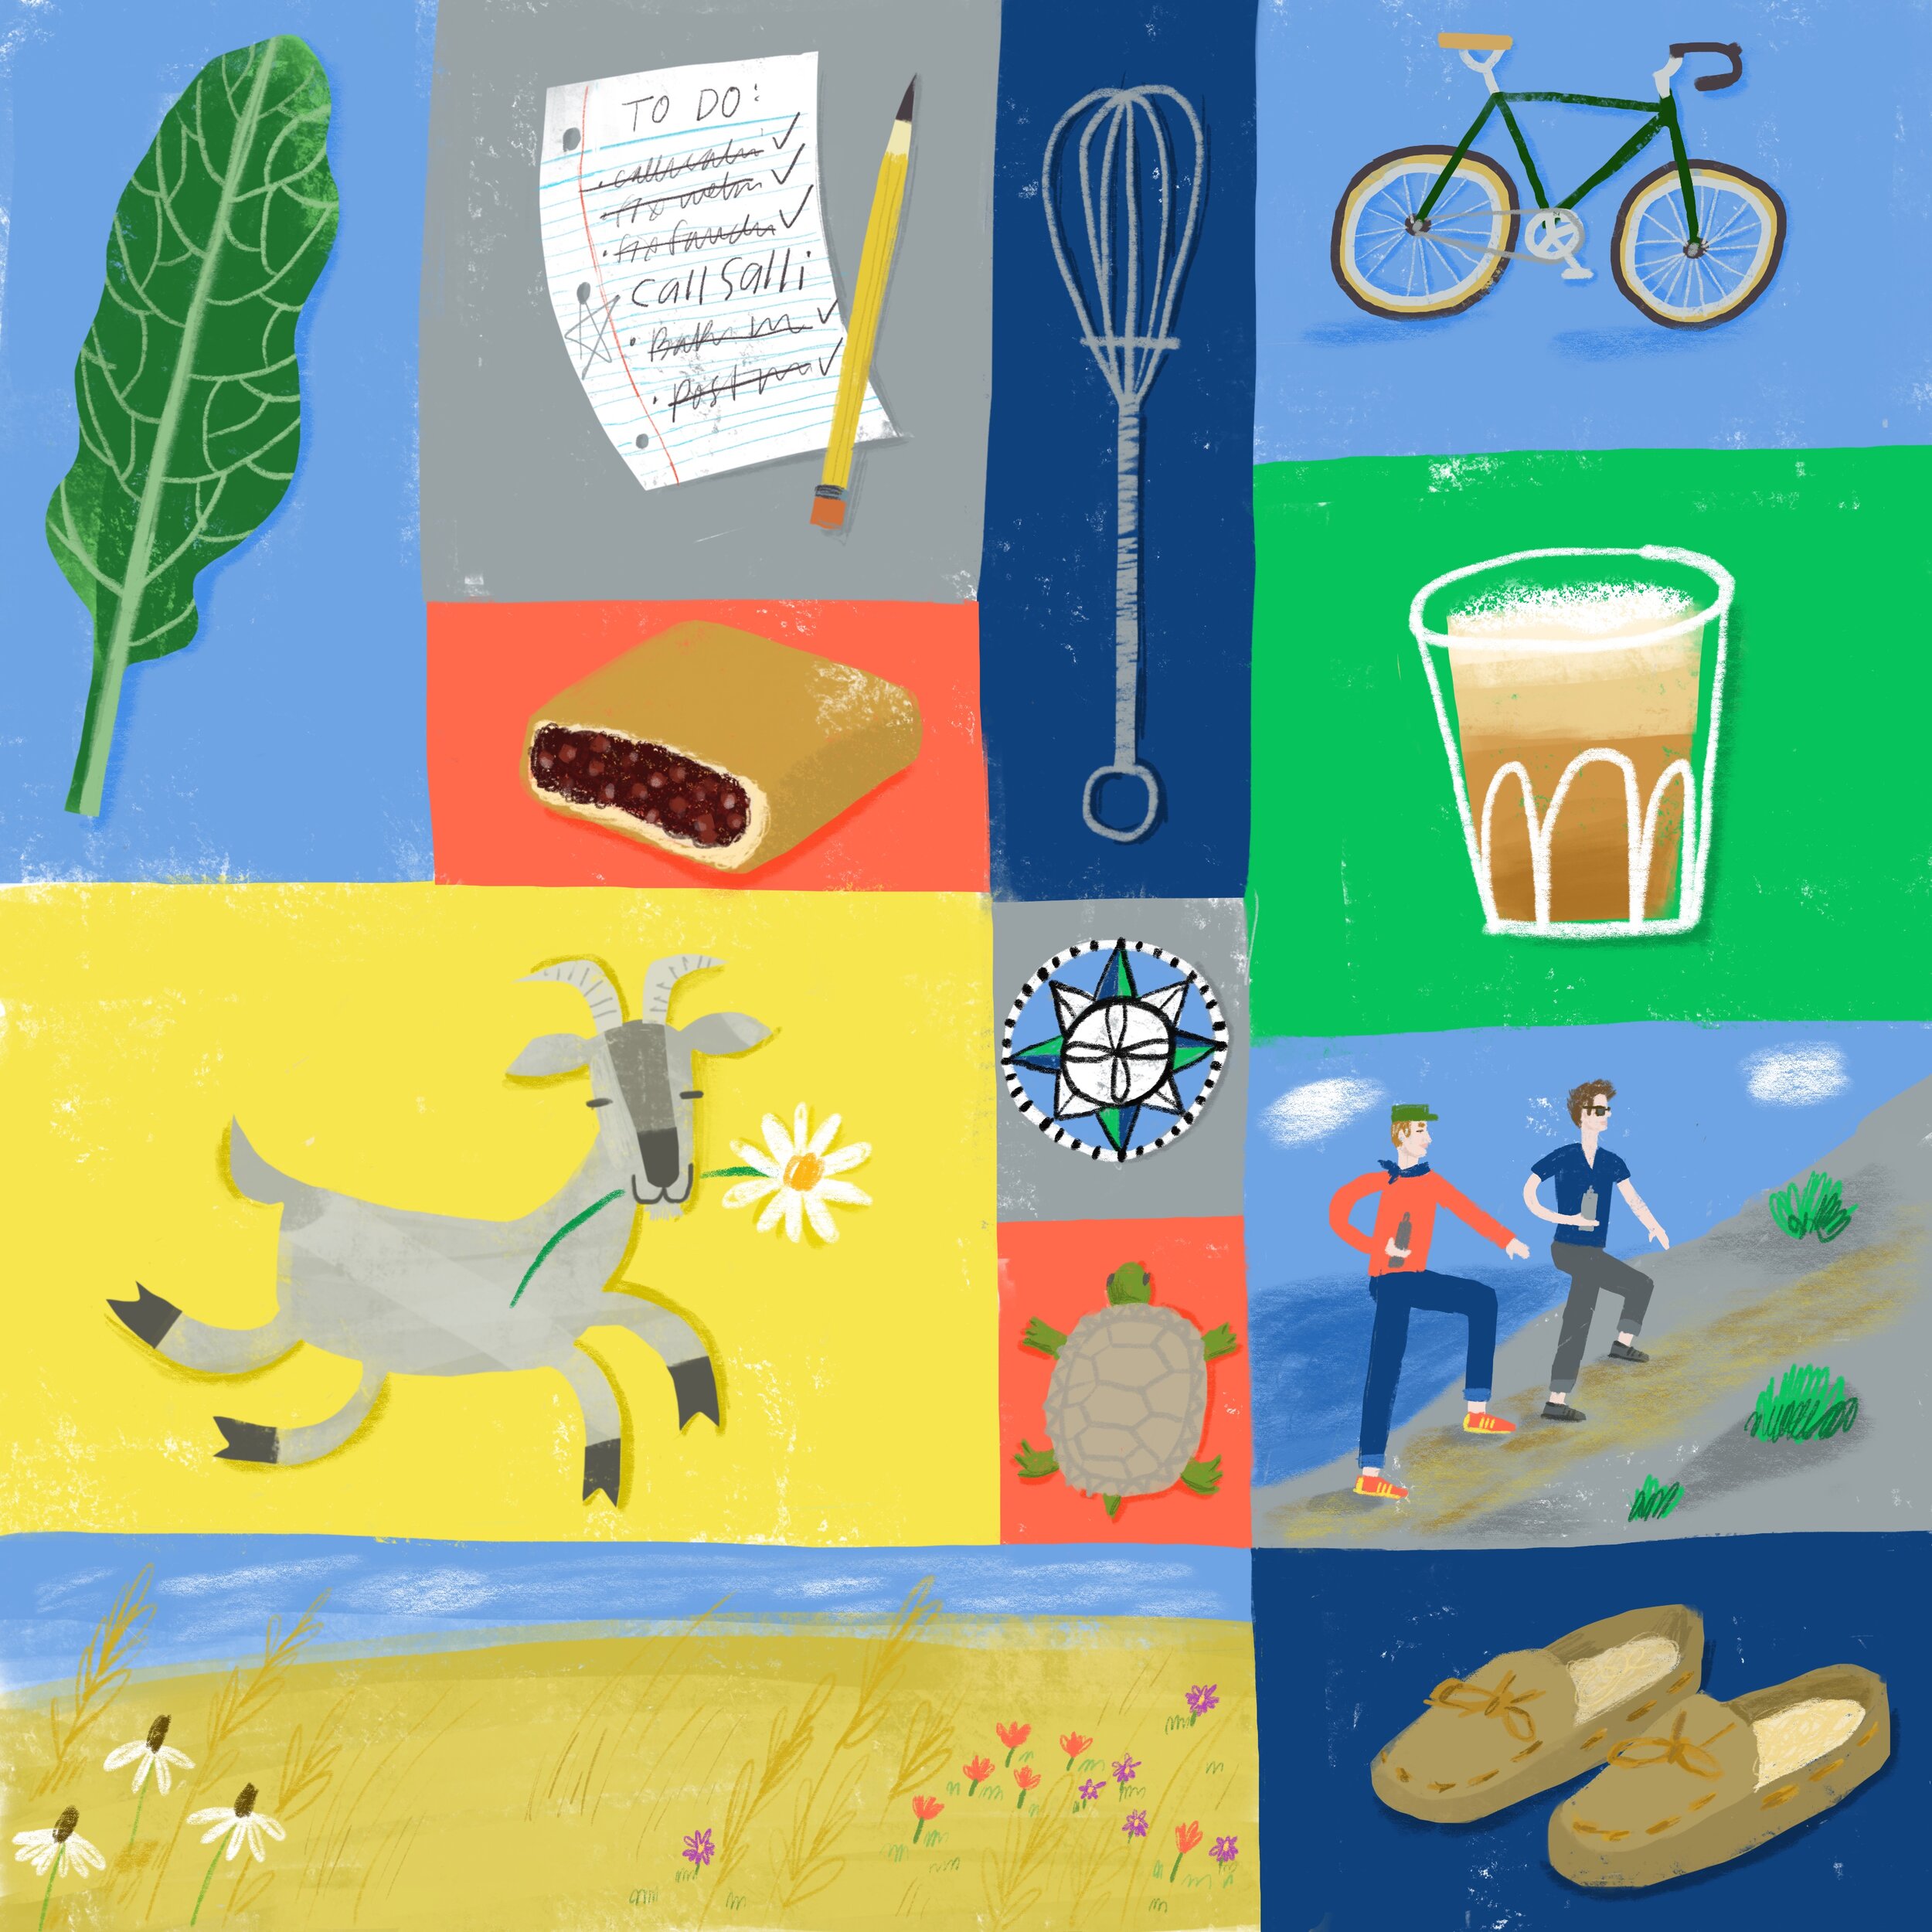
Who do you want to create this illustration for? Choose someone you know pretty well and have had shared some fun times together. Maybe this is for their birthday or a holiday gift. You can honor a friend, close family member, child, grandparent or anyone who makes you smile. For this tutorial I’ve selected my friend Coco. I wanted to celebrate her 11th birthday with an illustration that reflects her lively personality!

Start by making a list of the things they like and the things that remind you of them. Maybe it’s their favorite foods or hobbies or activities. Silly and random bits are fun to include! Places you’ve visited together are also great. 10-20 items is a good manageable list. You can always add items later and don’t worry that you have to include everything in your illustration. Your list will be the springboard to your illustration.

Next create a page of sketches and icons that represent some of the things on your list. You can combine some items or find one symbol that reflects the idea. In this case, I am using wooden shoes to reflect Coco’s Dutch heritage. No need to be literal for each item. You can use a heart shape to represent another individual in that person’s life or a sea shell to represent the beach. These sketches will be your reference page.
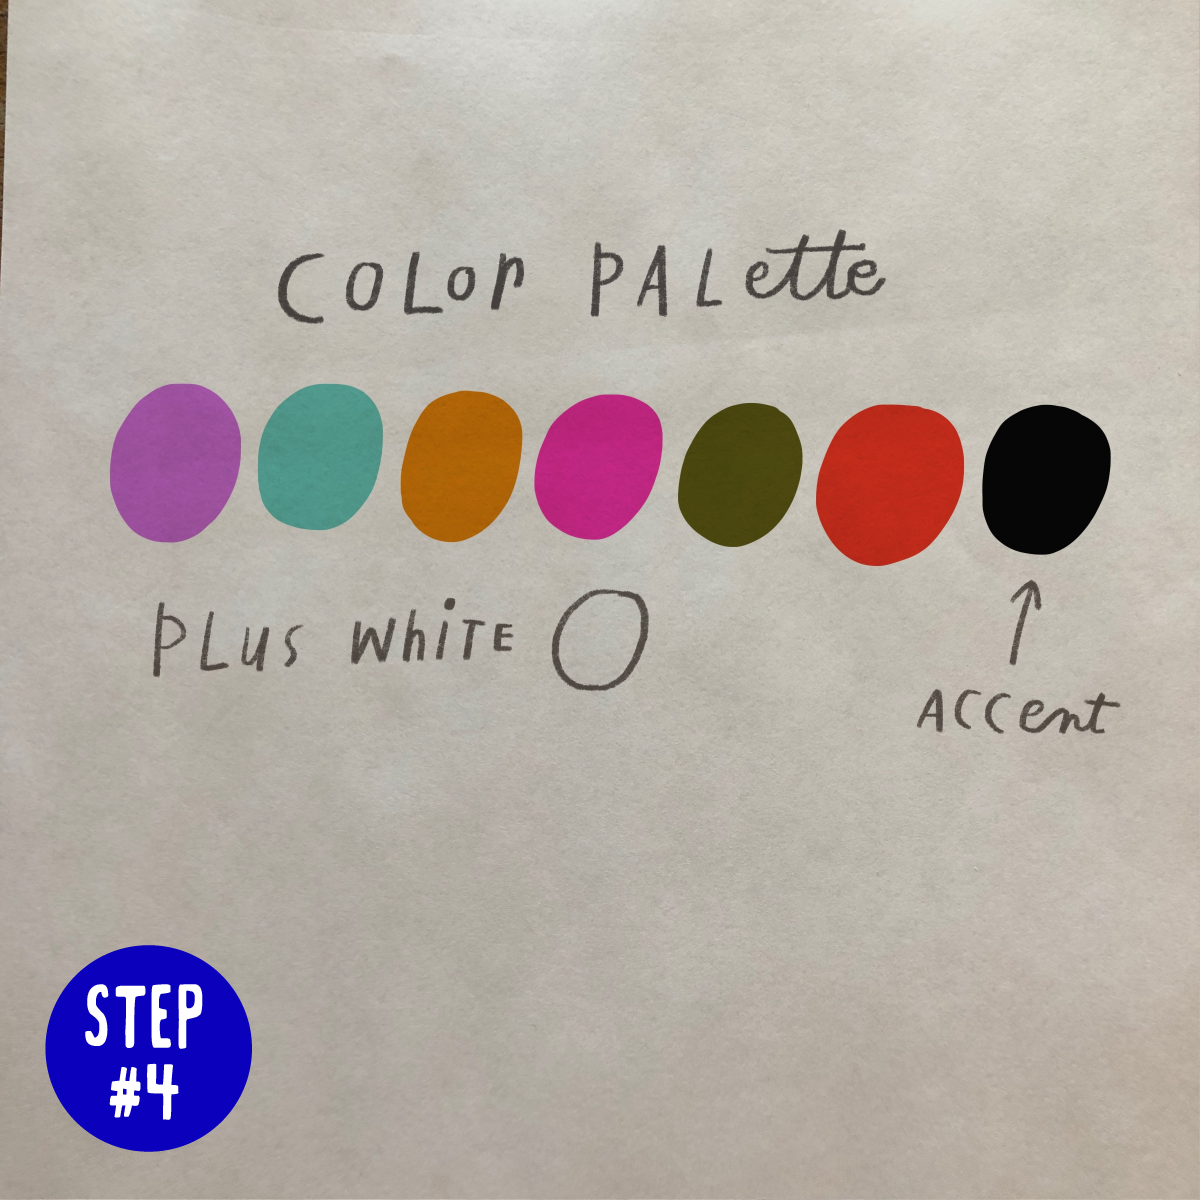
A cohesive color palette is going to be the one thing that holds your design together. Select colors that reflect the recipients personality and style. Do they like earthy colors or jewel tones? Do they tend to wear certain colors more often or decorate their homes using a special palette? For my illustration I’m chose a punchy palette to reflect Coco’s creative spirit and an orange that ties in with her gorgeous red hair! Keep your palette to under 10 colors. Don’t worry with being literal in your use of colors, there is nothing wrong with a pink cat or a blue ice cream cone.

I suggest working in a square format (8 x 8 works for me). Create your grid structure using a variety of squares, rectangles and narrow strips. I try and not let there be a continuous line running either vertical or horizontal as it will create a visual split in your illustration. As I’m creating my grid I’m being mindful of what icons might fit into what space but I’m not letting it completely determine the grid pattern. I want a nice balance of shapes and sizes. The narrow spaces are good for adding small patterns or little details. A good number of shapes is somewhere between 15-20.

Fill in your shapes with icons from your sketch page. The scale between items should vary to maintain a sense of playfulness. I like to start filling in a larger space first. Coco’s dog Diamond is a big part of her life along with hiking in the autumn leaves so I combined the two into one panel. Coco and I draw together with friends a lot and I wanted to make that prominent part of the illustration. Sometimes as I go along I might see that I have room to add another small panel or square. This is my favorite part of the process because it all starts to come together so nicely!

Time for color! Before I take the illustration to a full finish I like to block in the color to create a nice balance. If you are working digitally it’s easy to block in color but if you are working with traditional mediums you might want to create your color layout as a separate sketch using colored pencil or paint. Then you can refer to it as you go along.

Expect to spend quite a bit of time moving from Step 7 to Step 8! Here you will be refining your sketches and turning everything into a finished illustration. For my personalized illustration greeting for Coco I used a fun spray texture that added just the right amount of visual interest and seemed like a good fit for Coco’s personality. I had such a great time creating this illustration!

YAY! It’s ready to share with your friend. You can send as a text along with a special greeting or message. You can also print out your illustration to give as a gift or turn it into a greeting card and mail it to them. It’s a really special way to celebrate a close friendship or meaningful relationship. Have fun creating your Grid Style Greeting! Use #gridstylegreeting to share on IG.
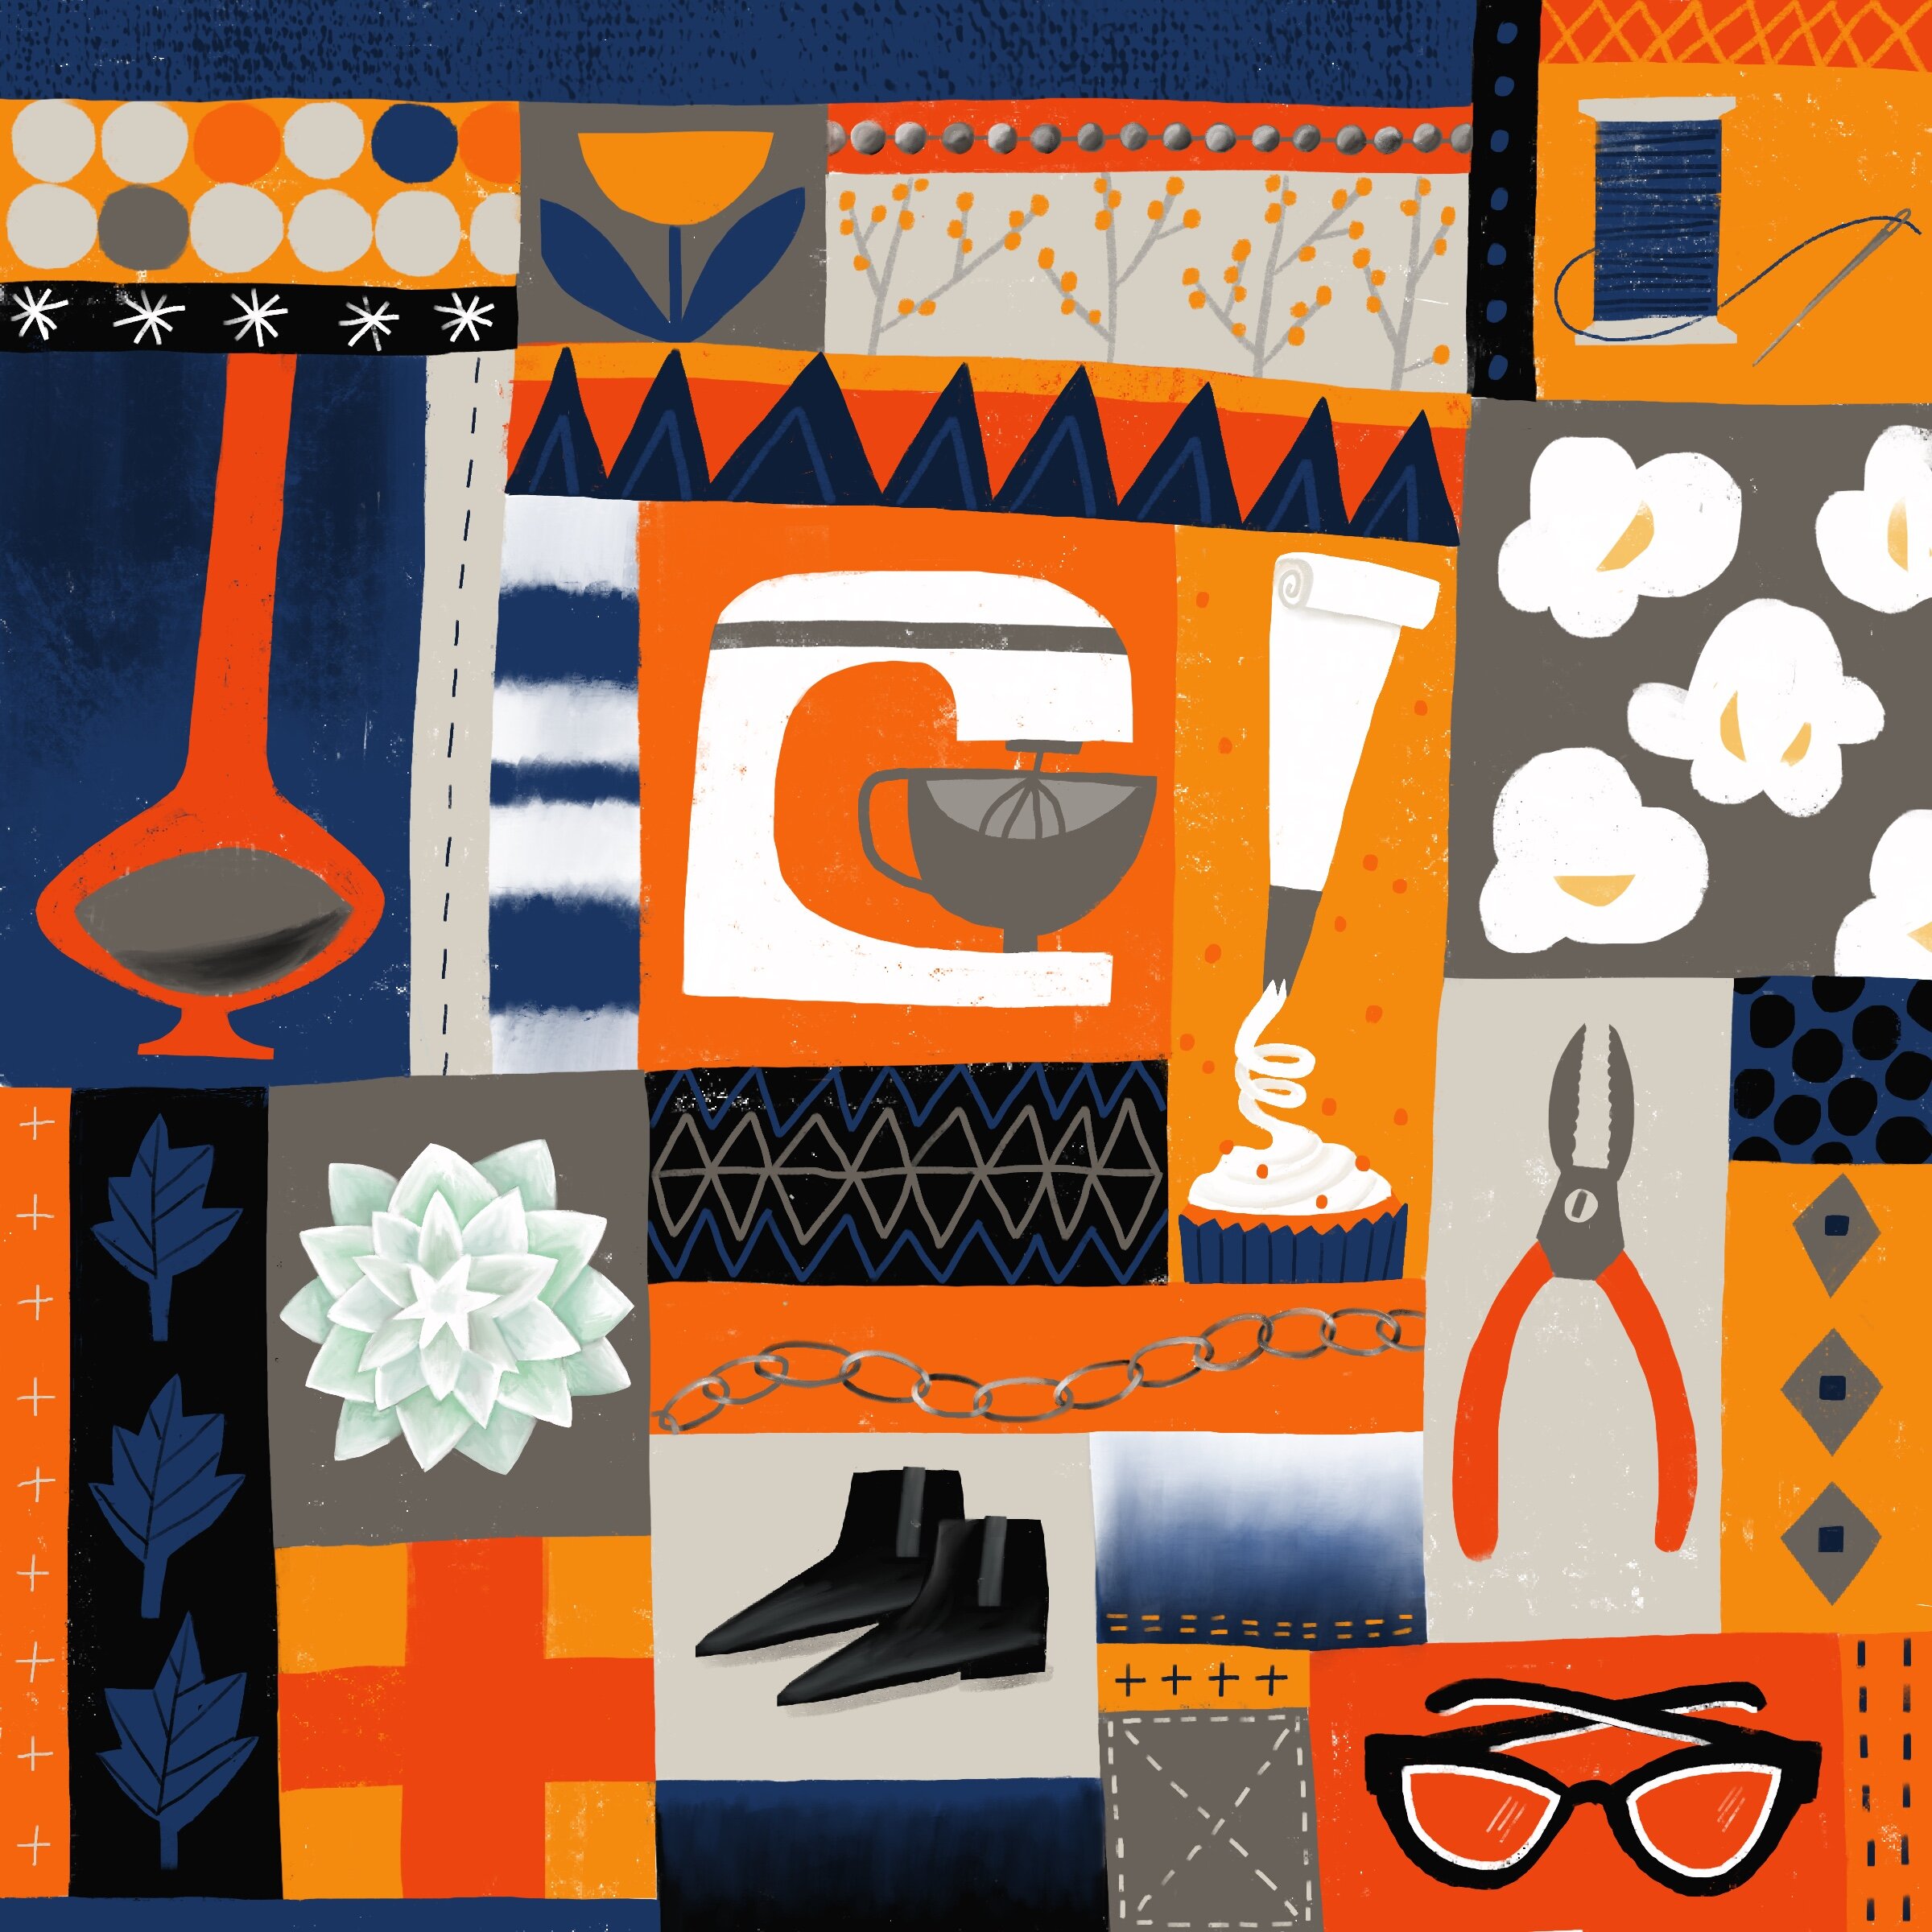
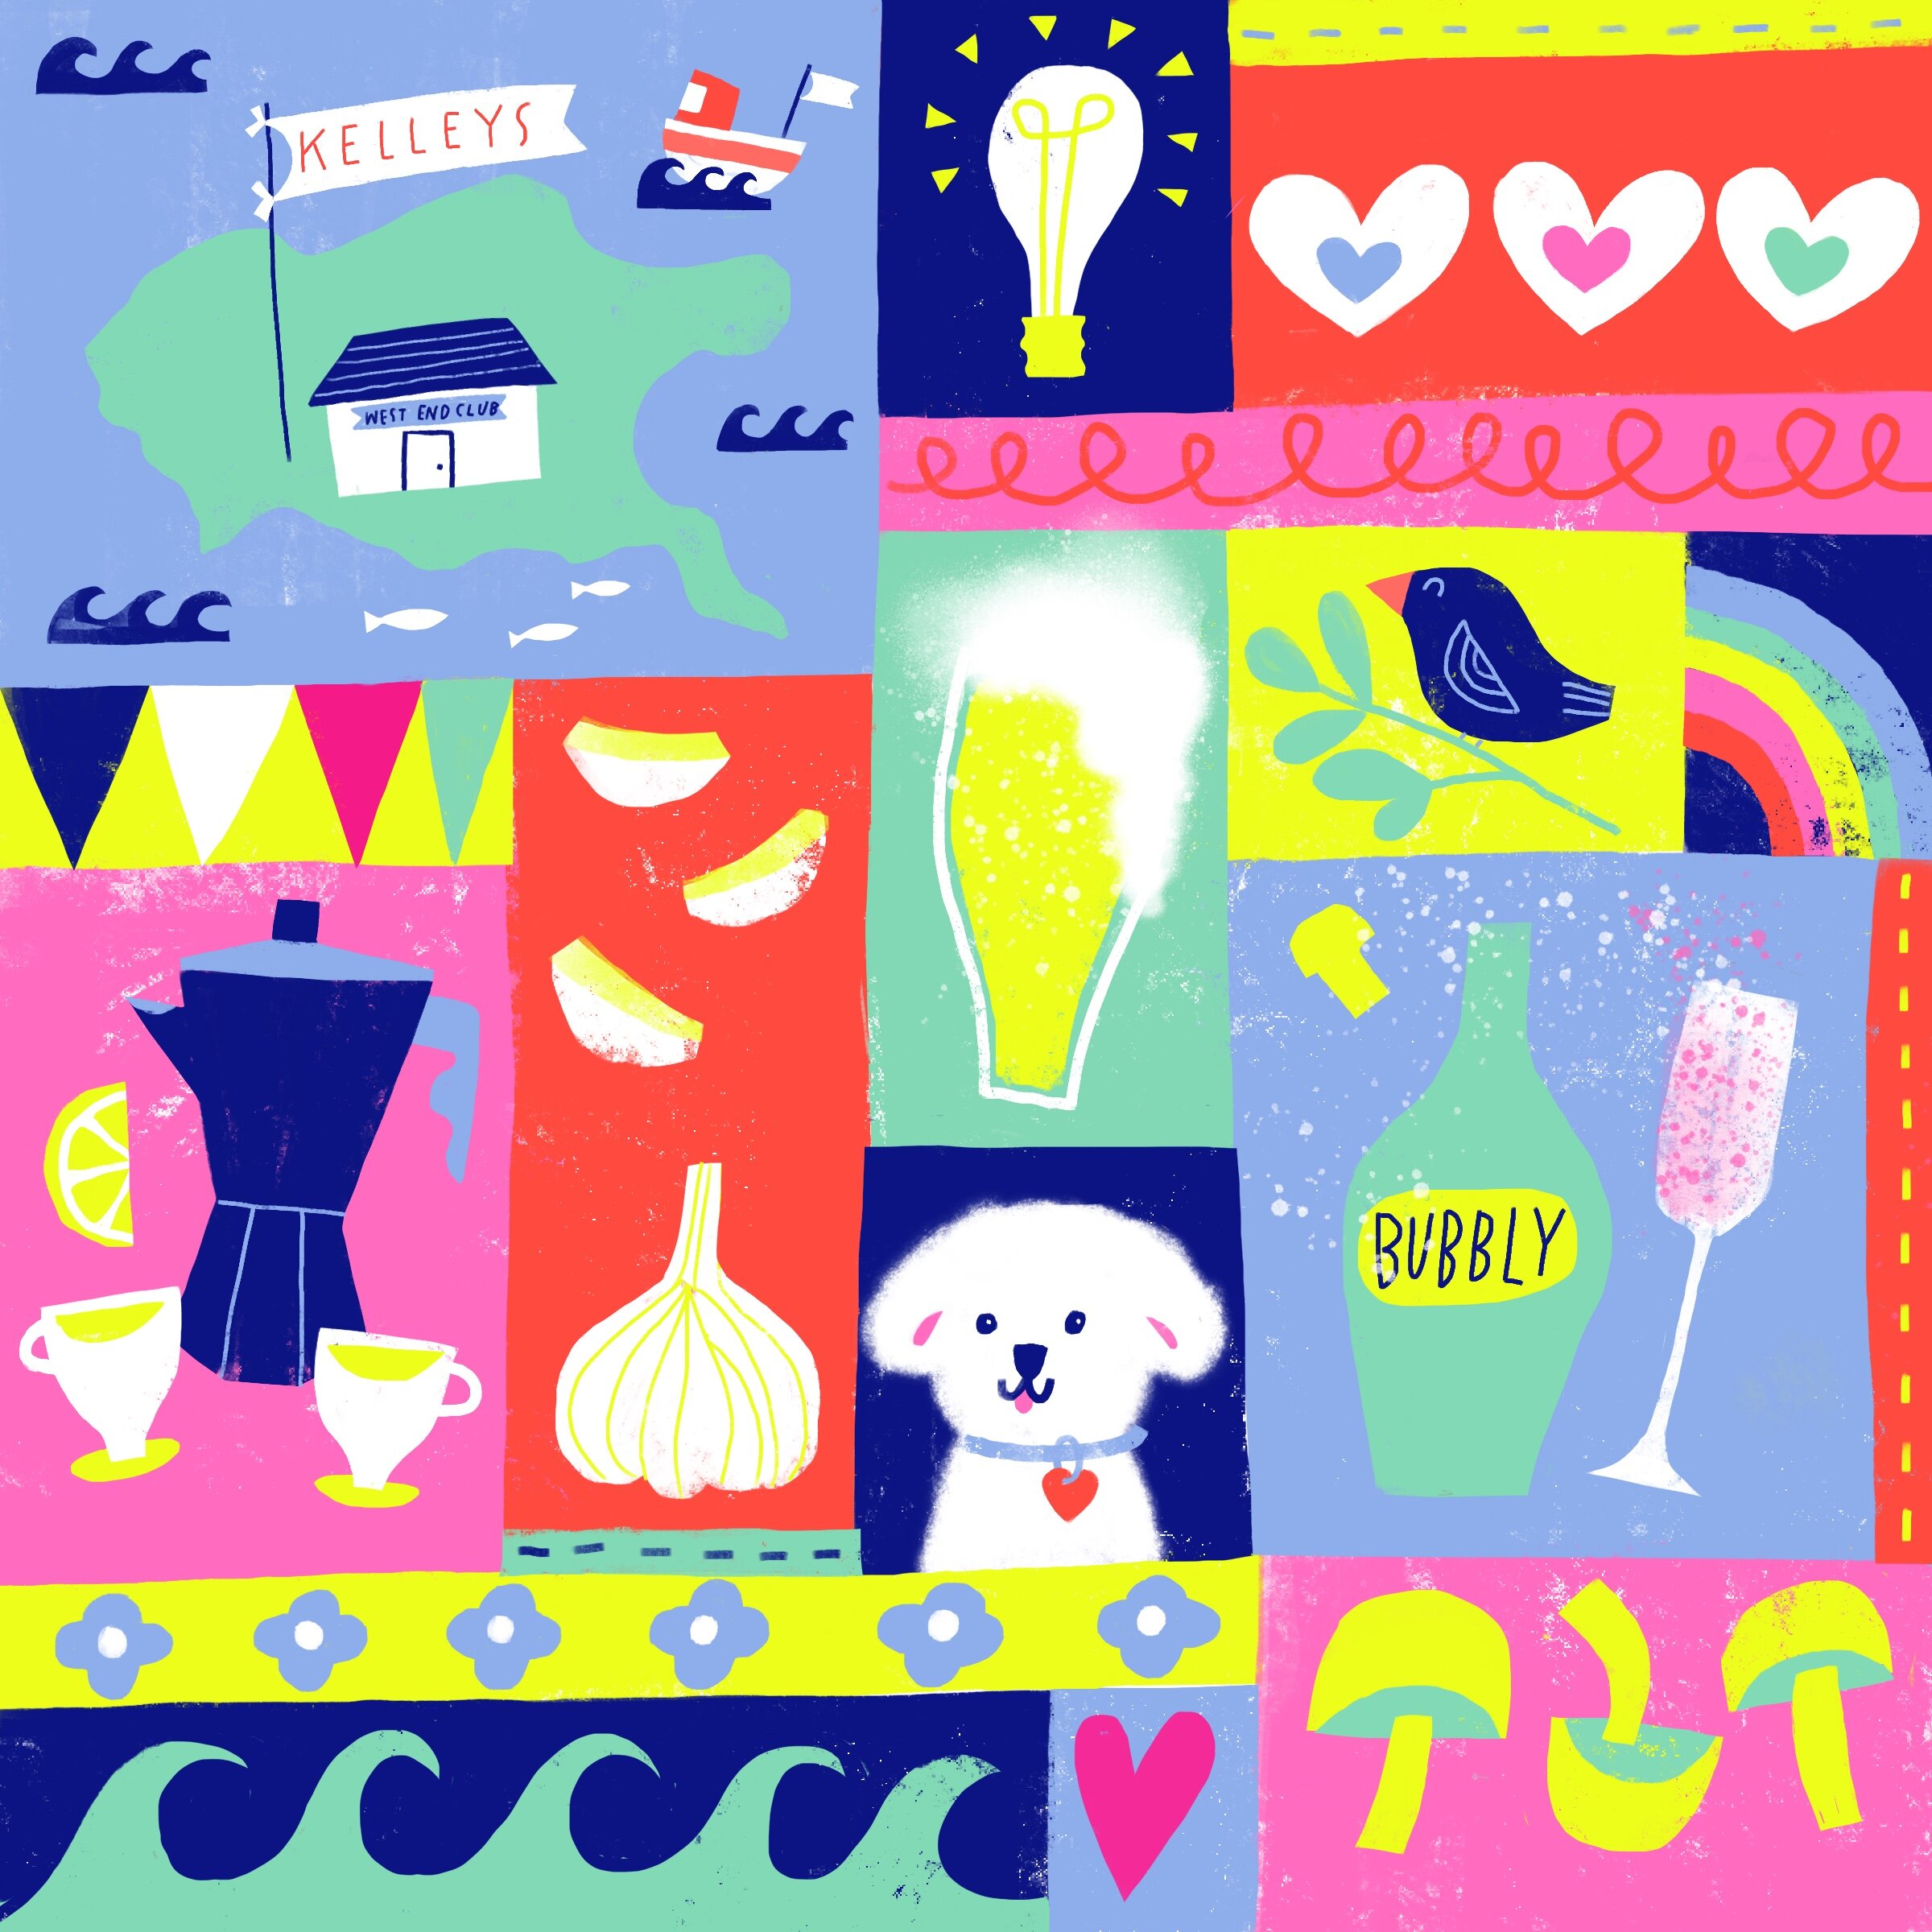
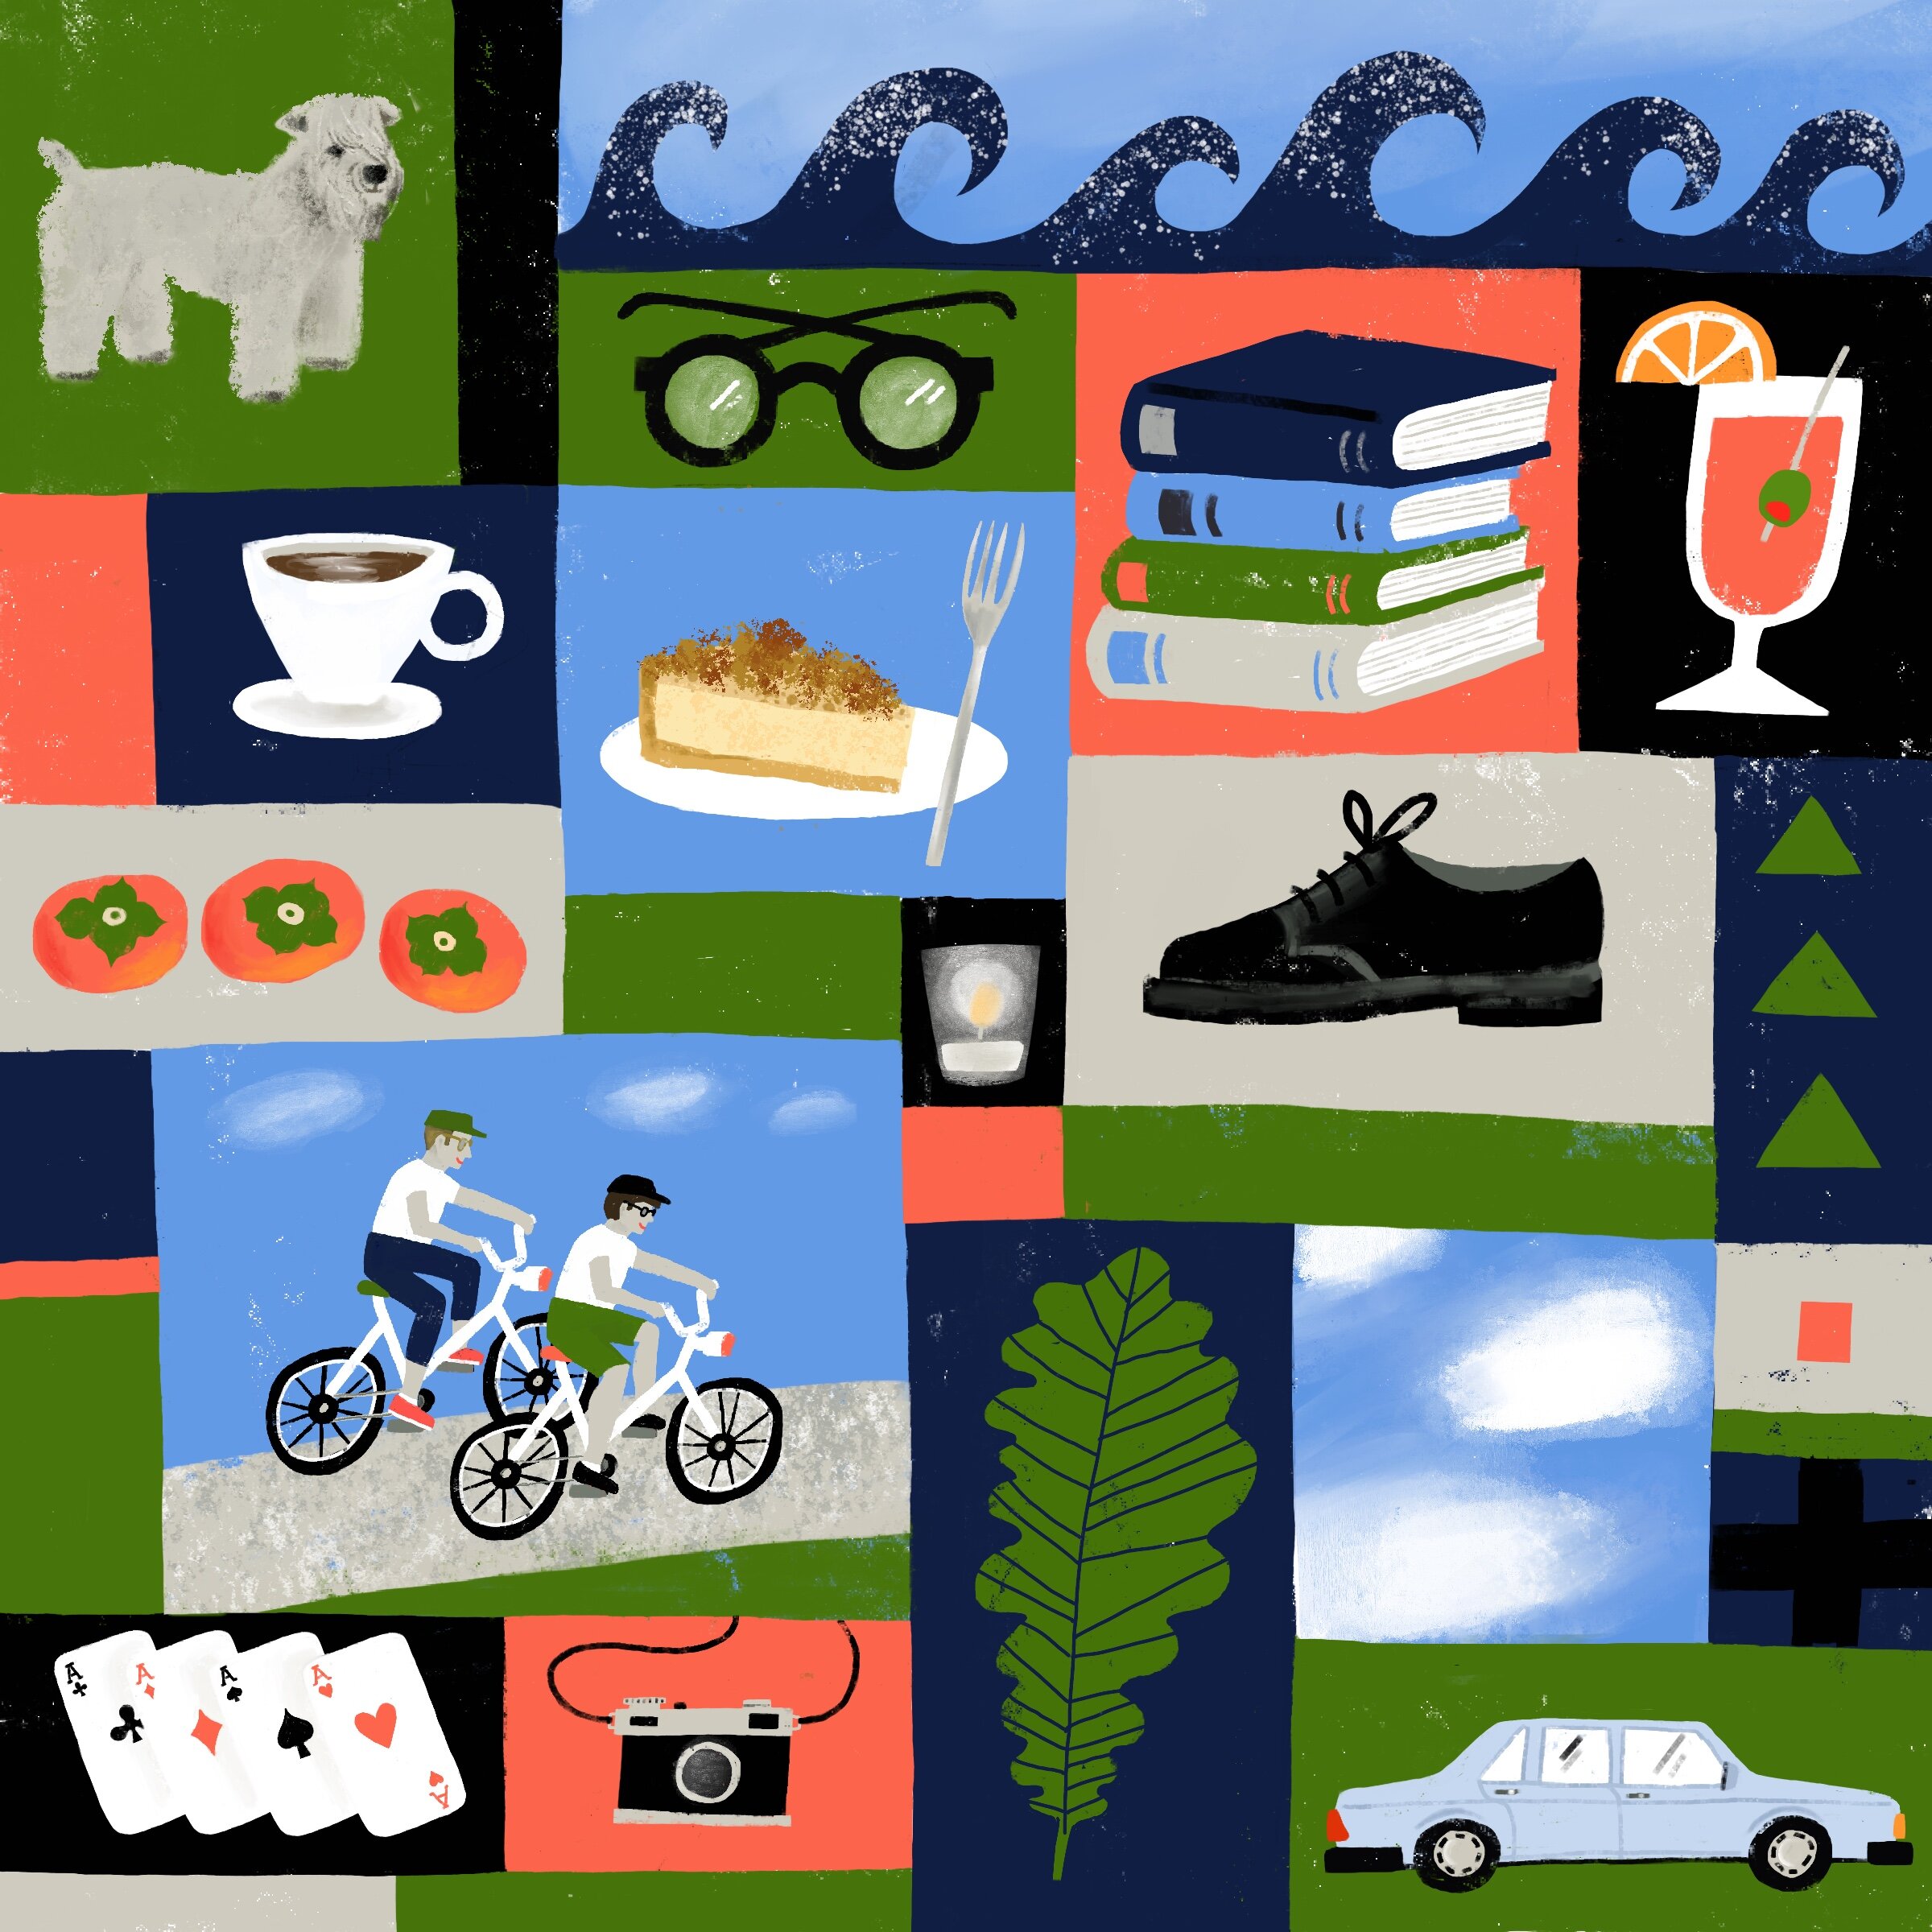
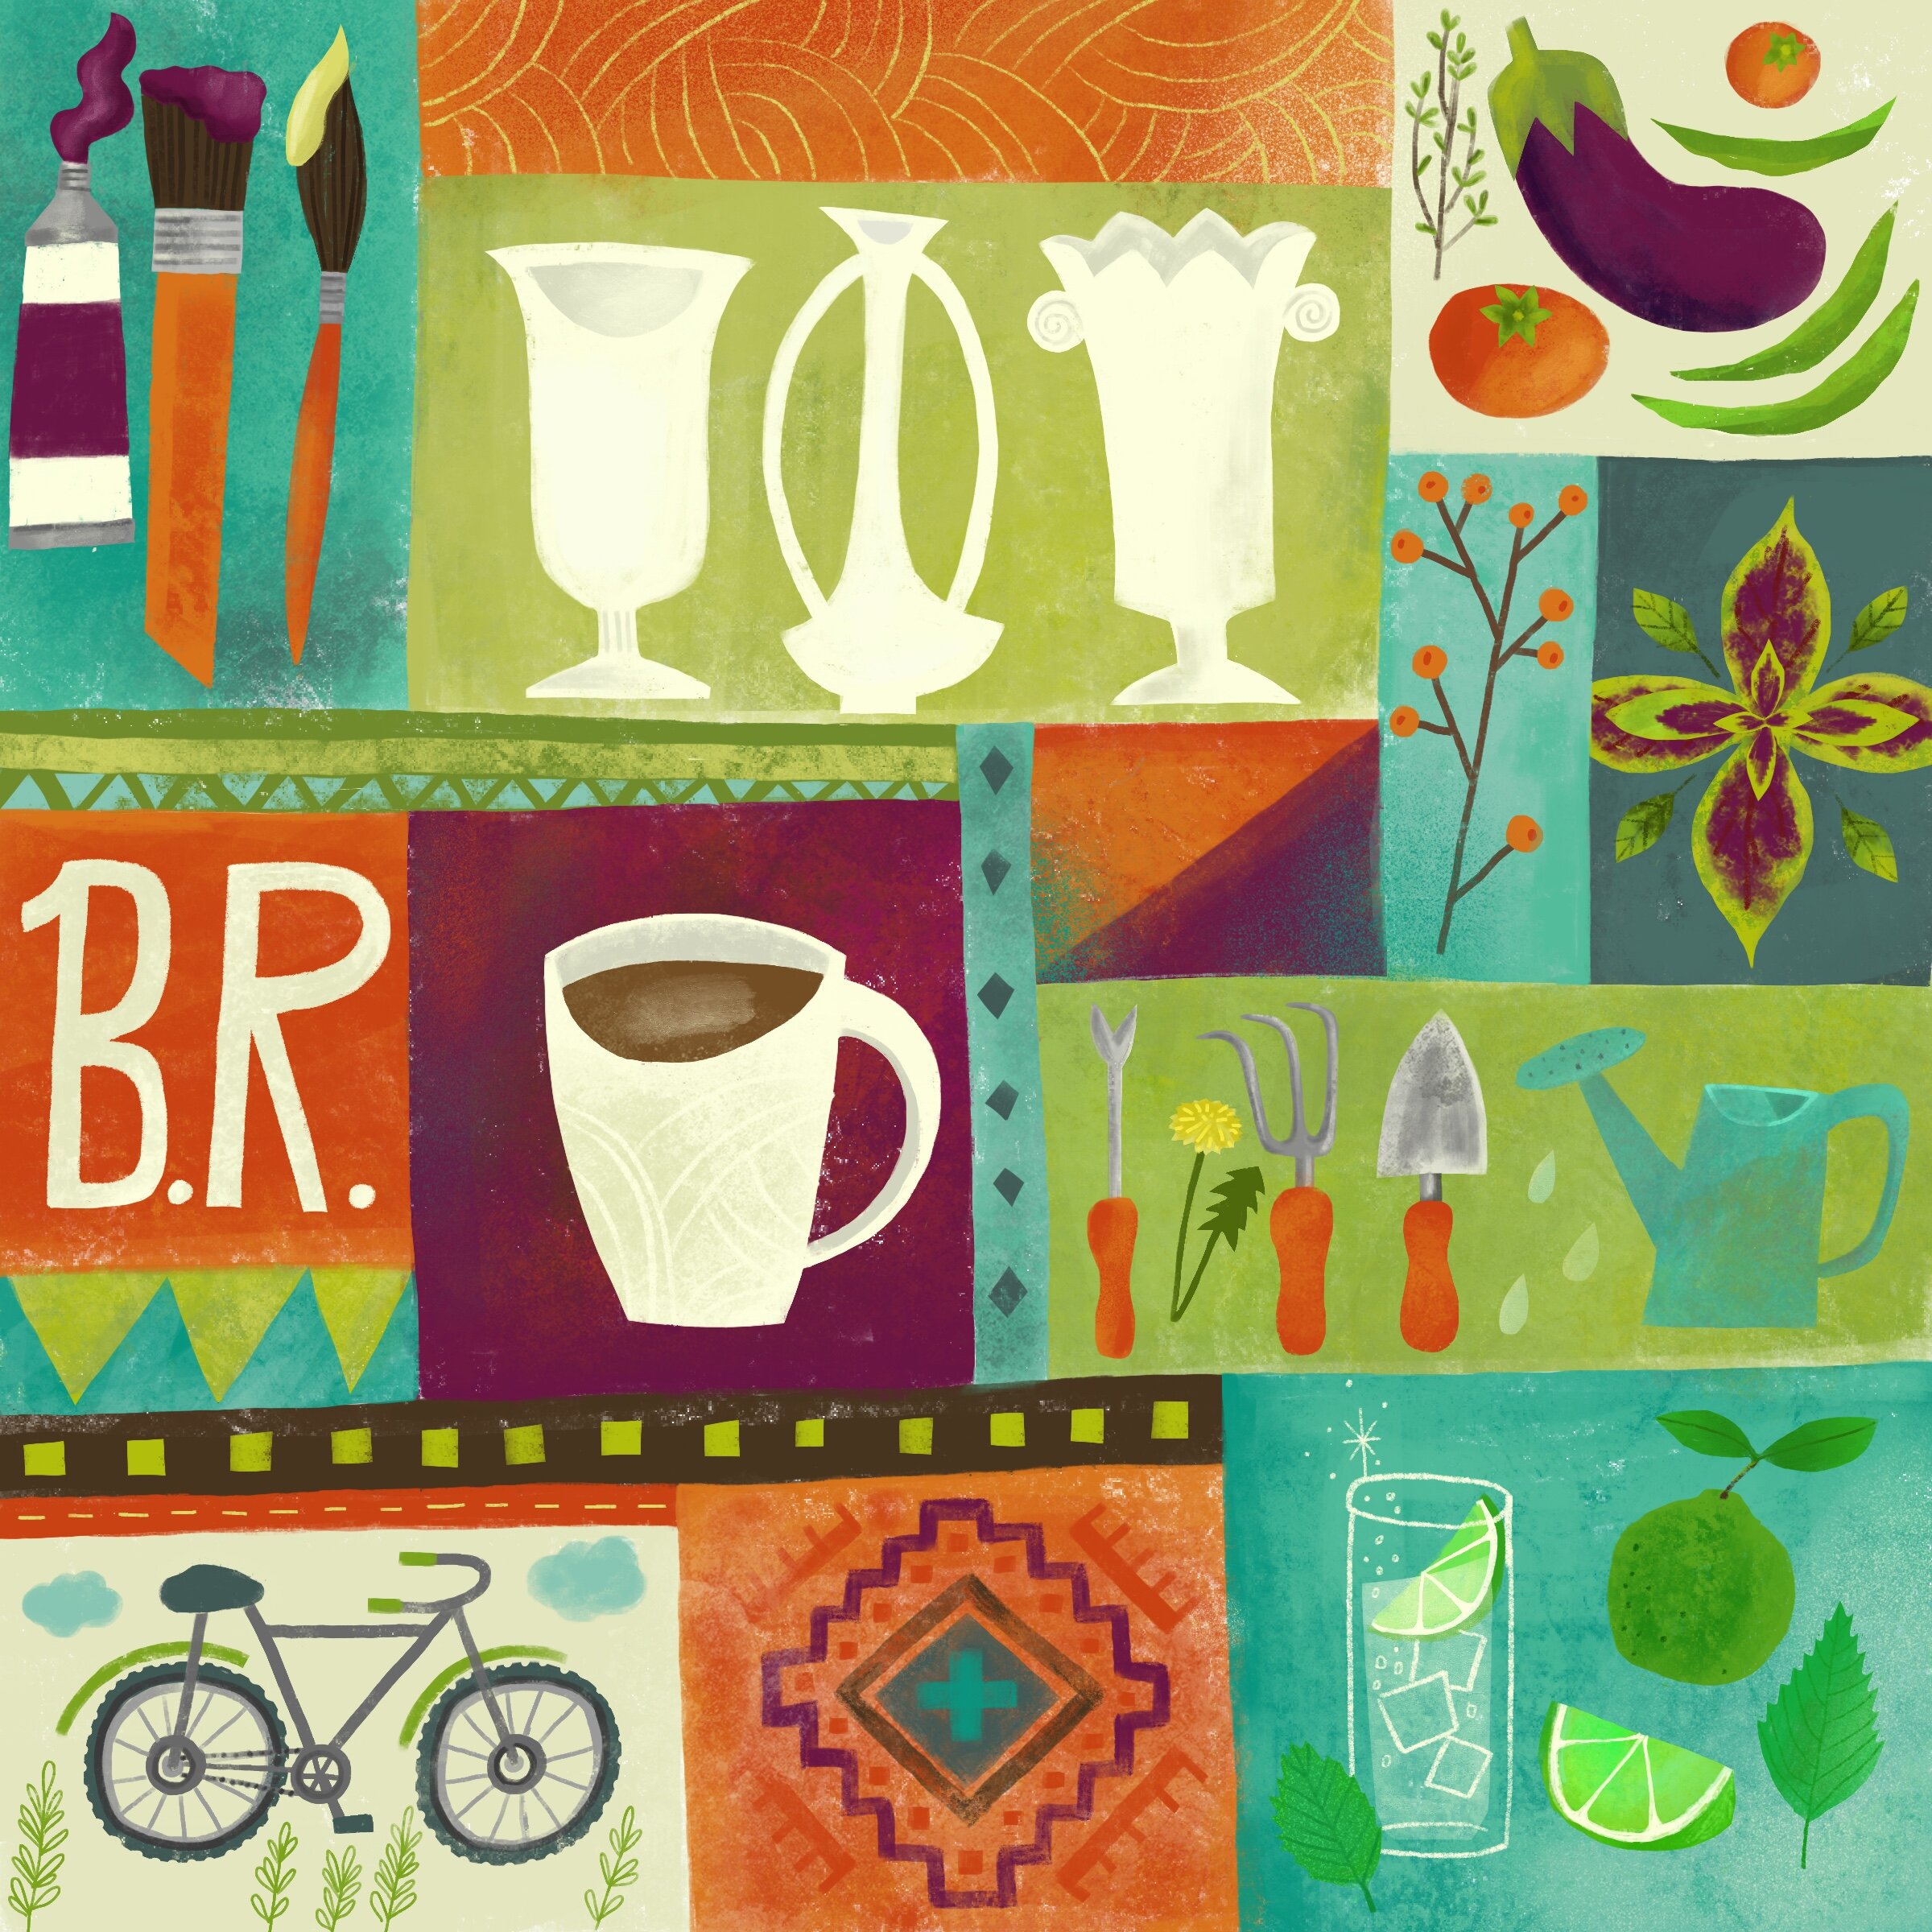
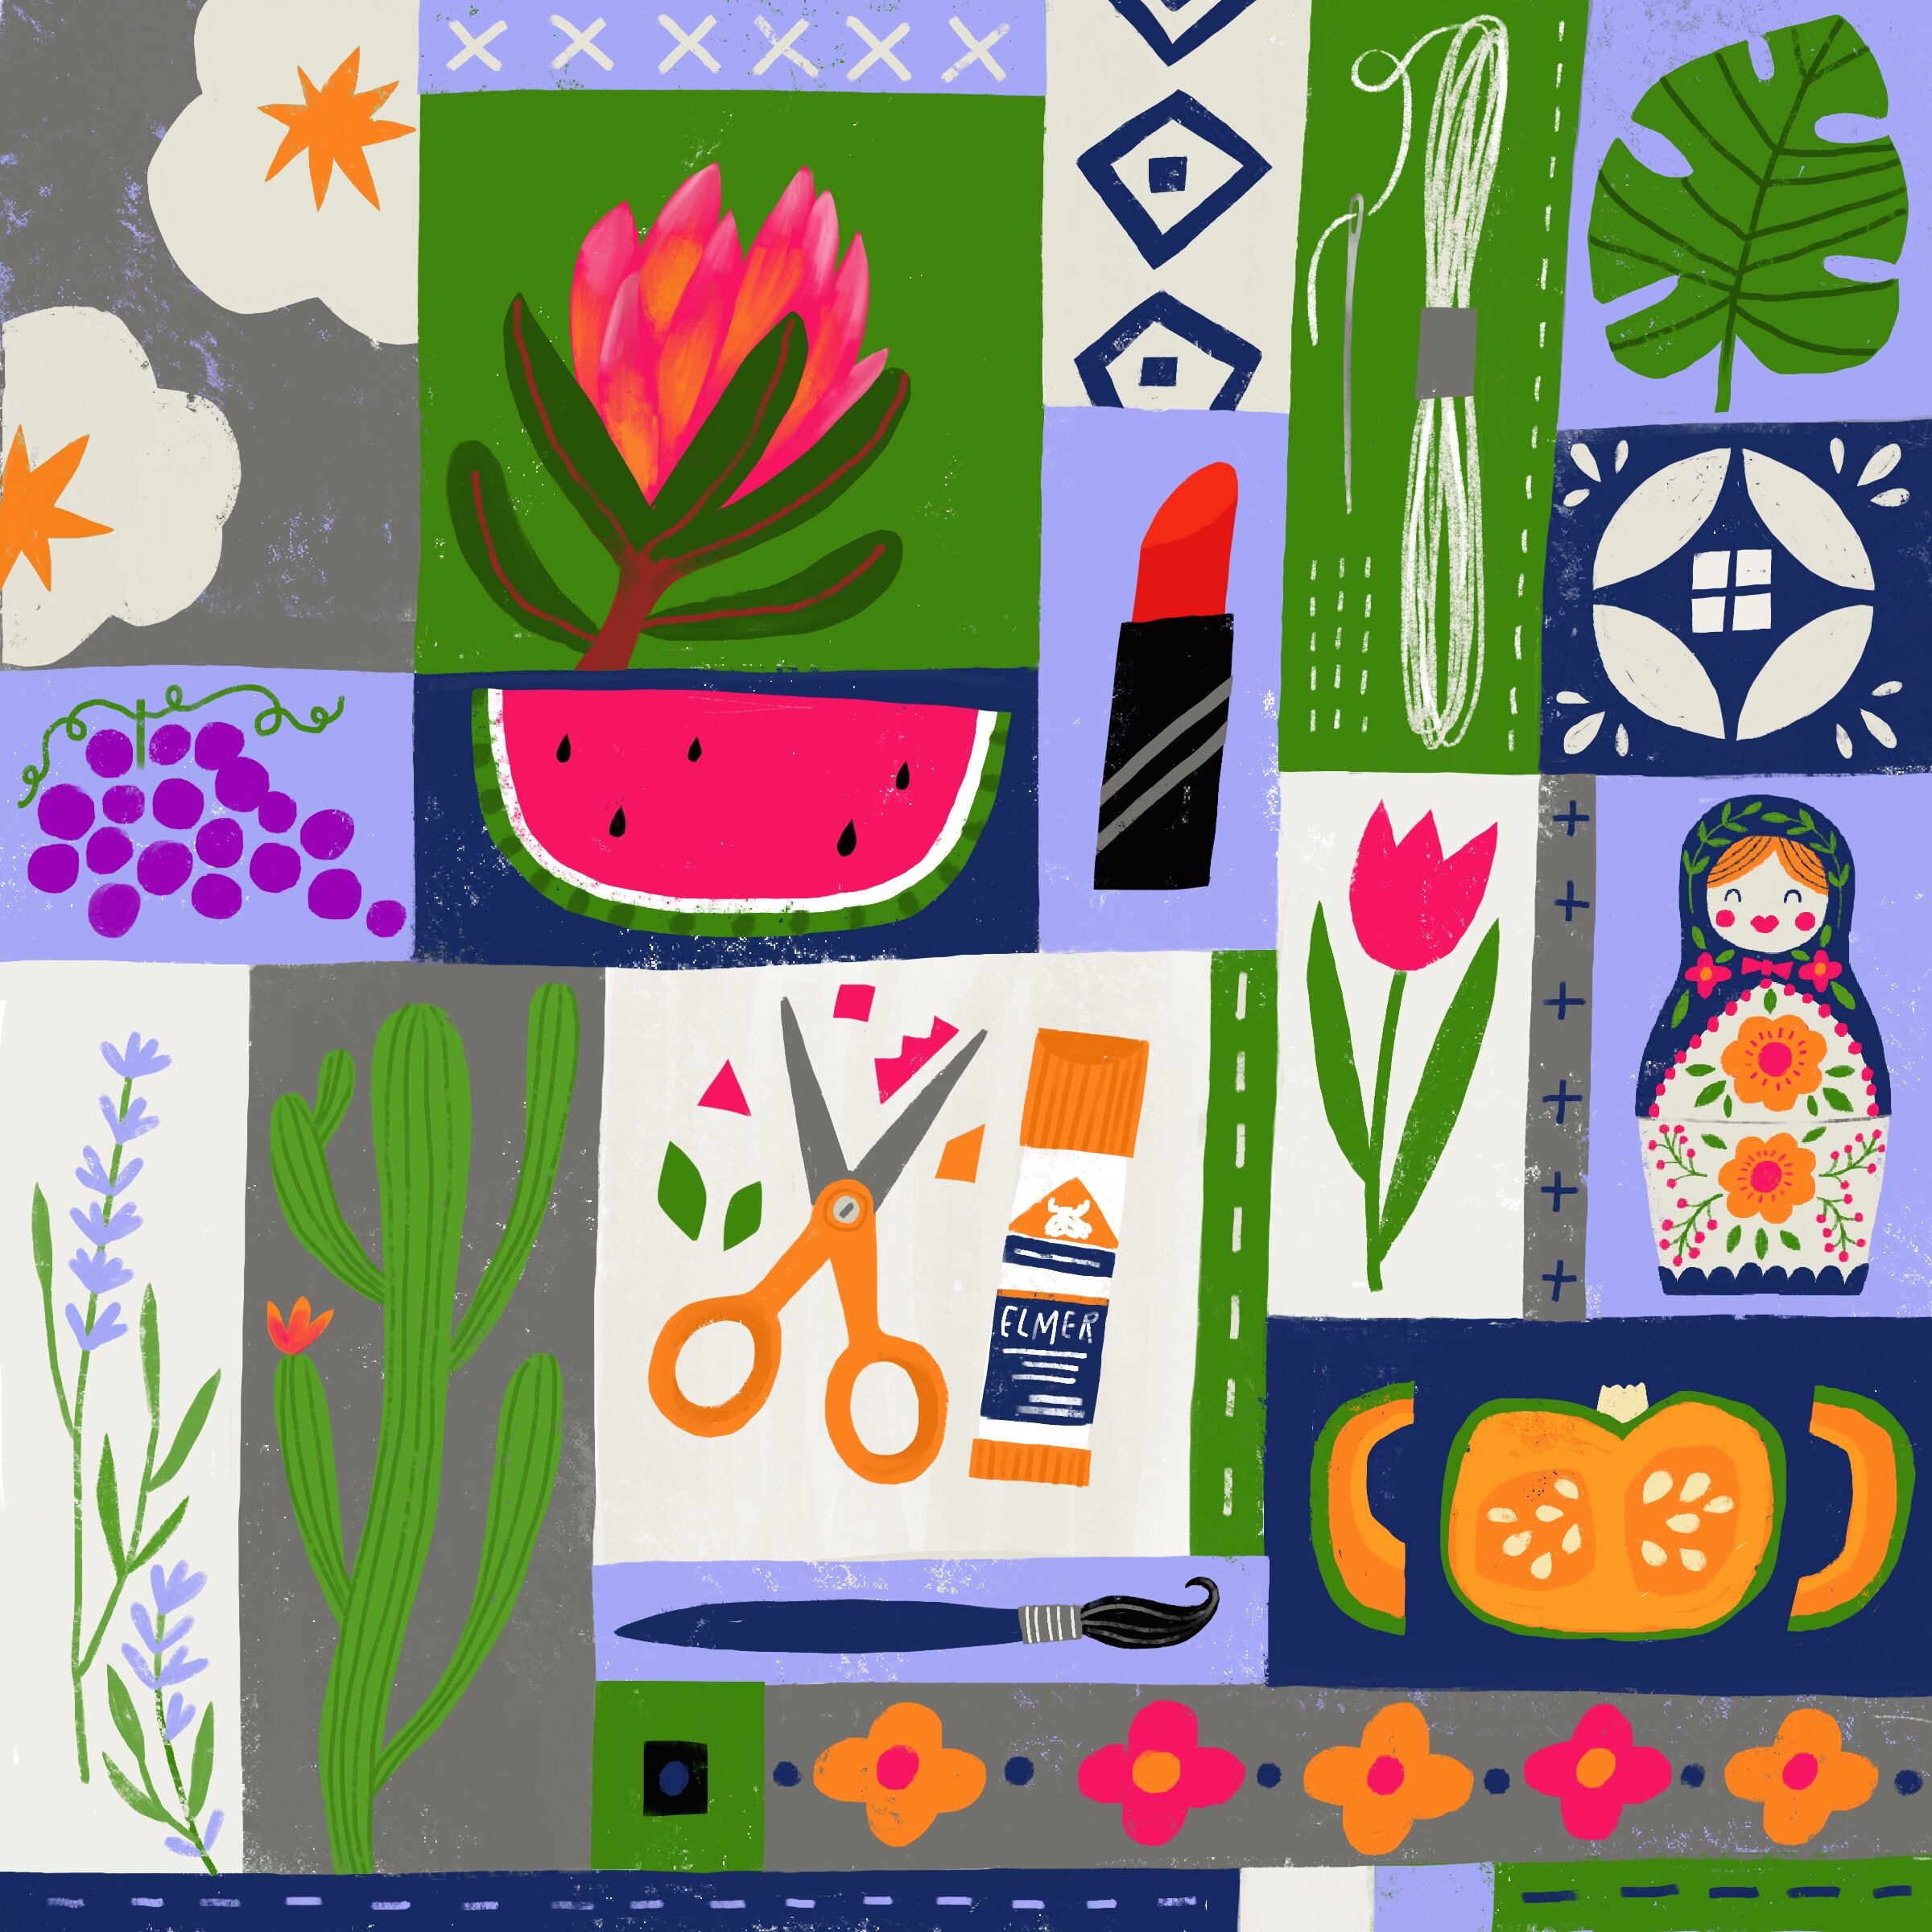
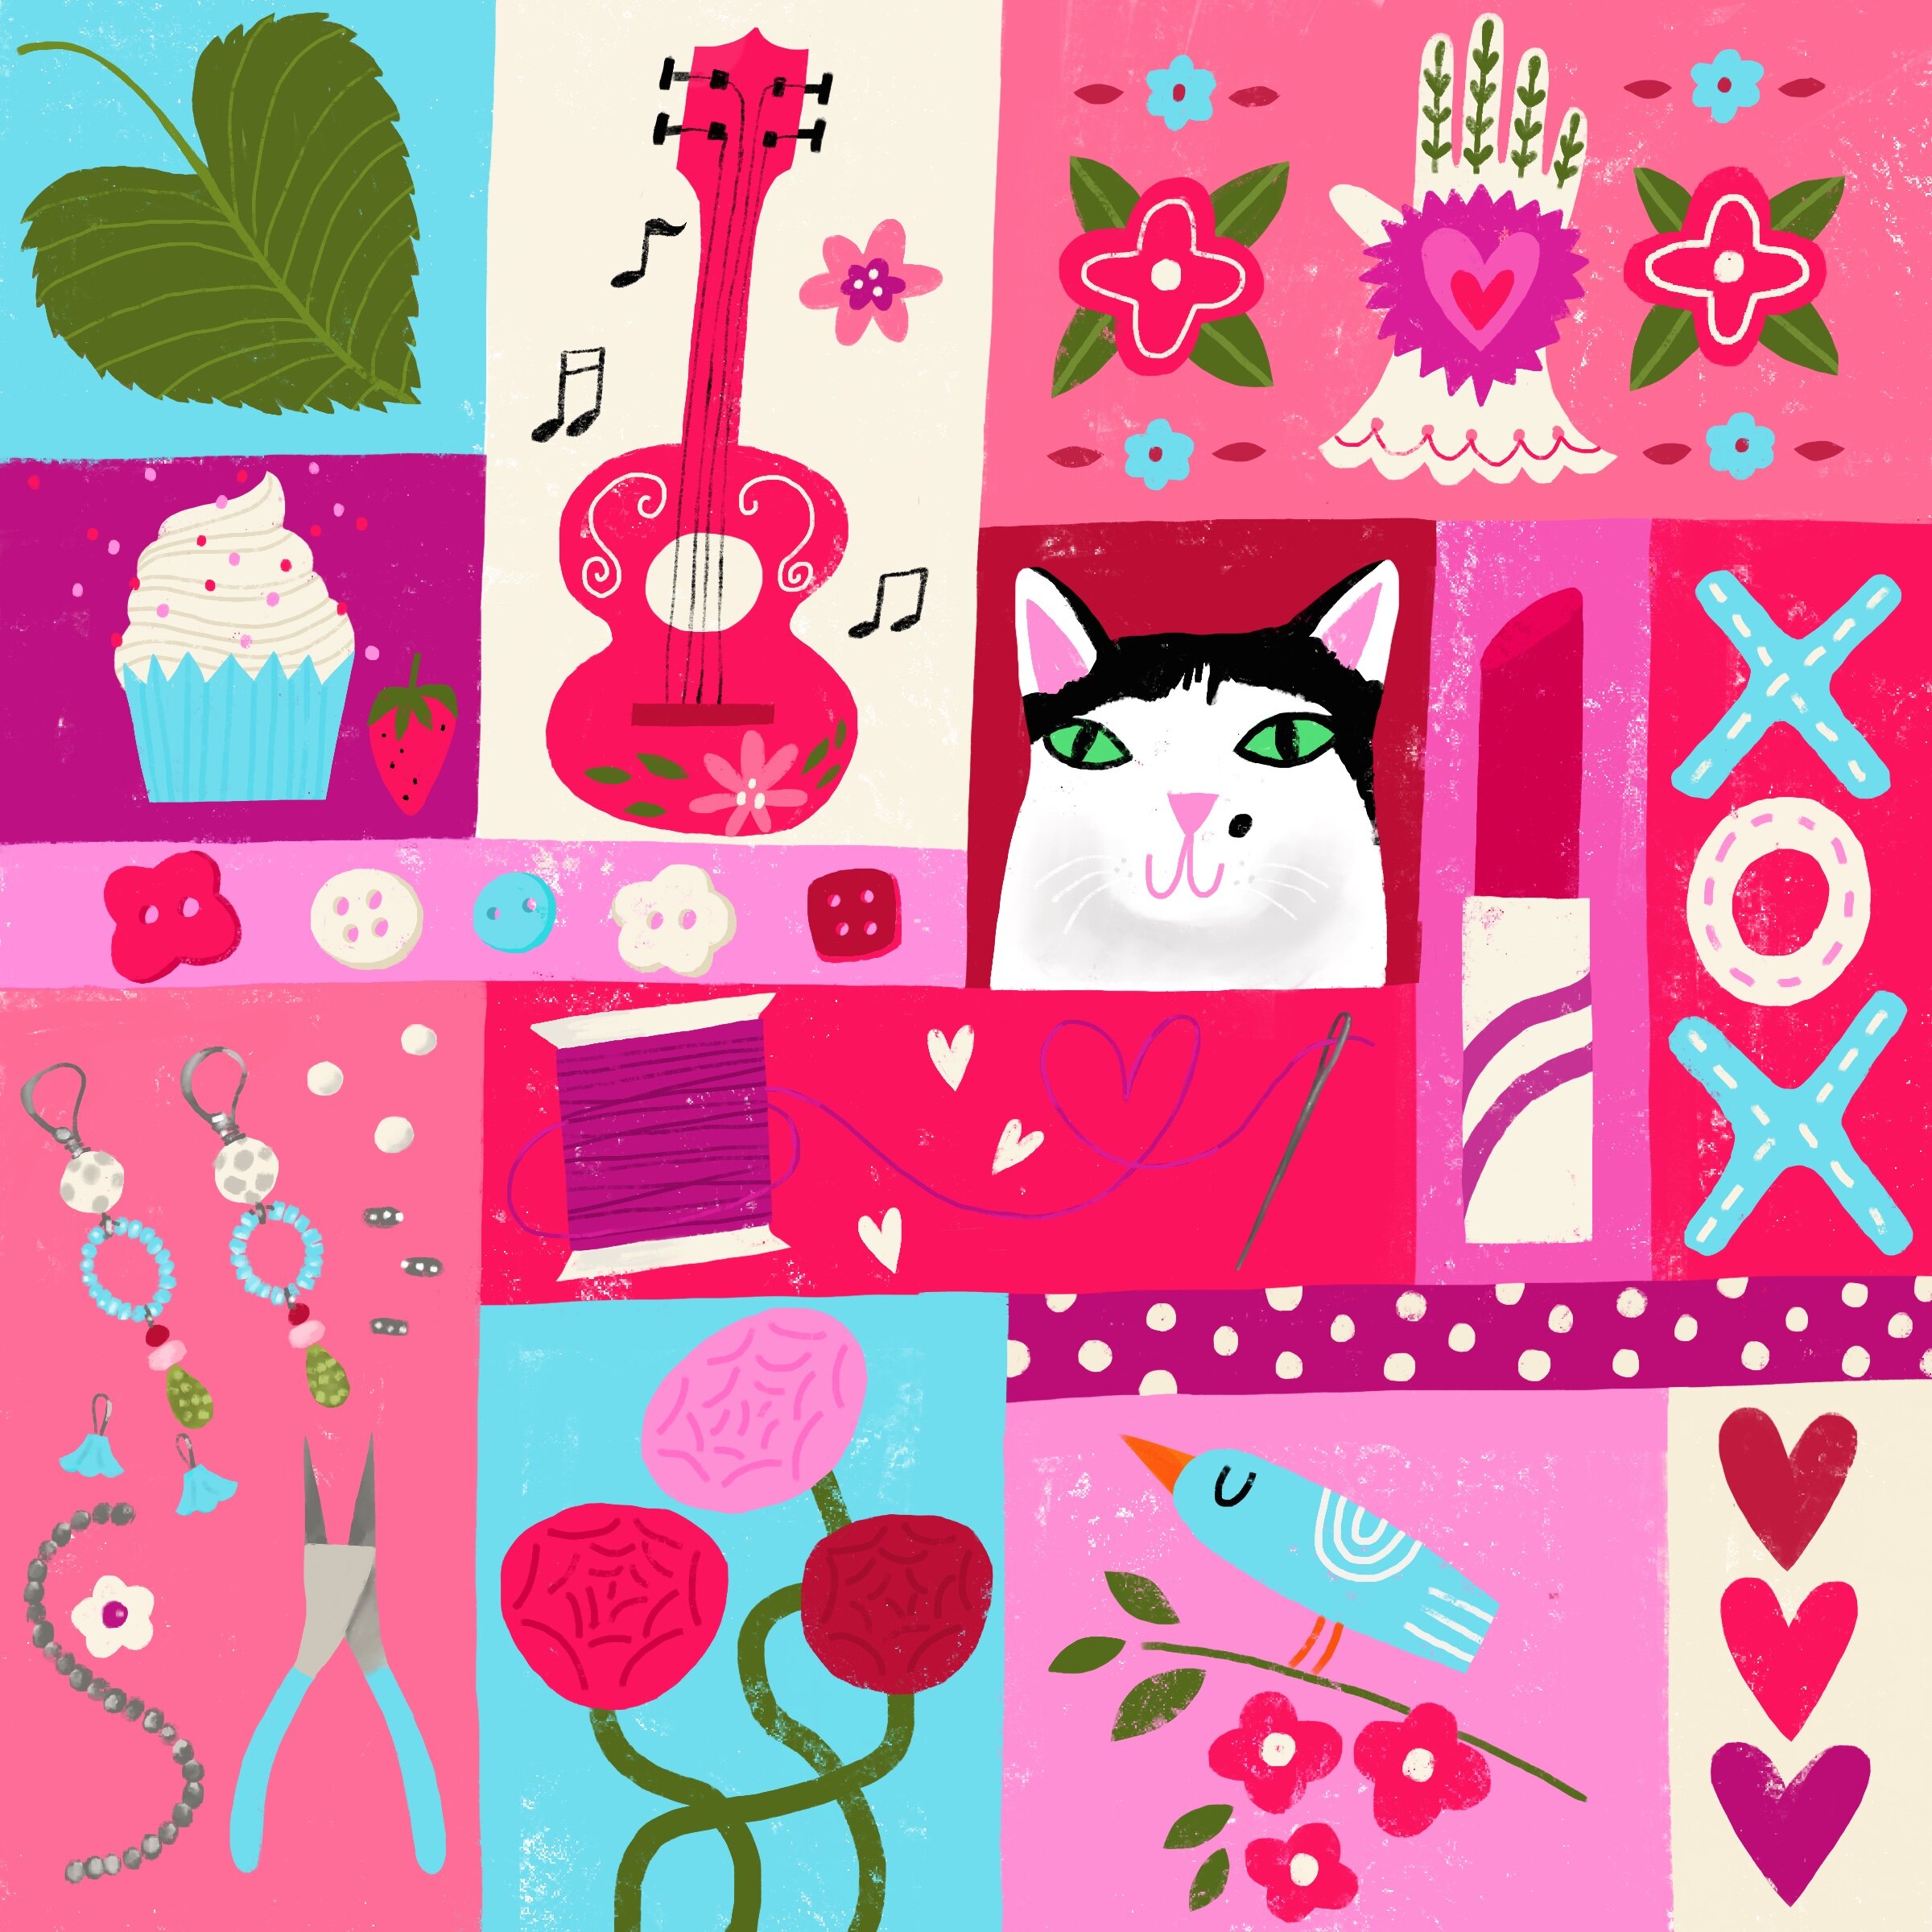
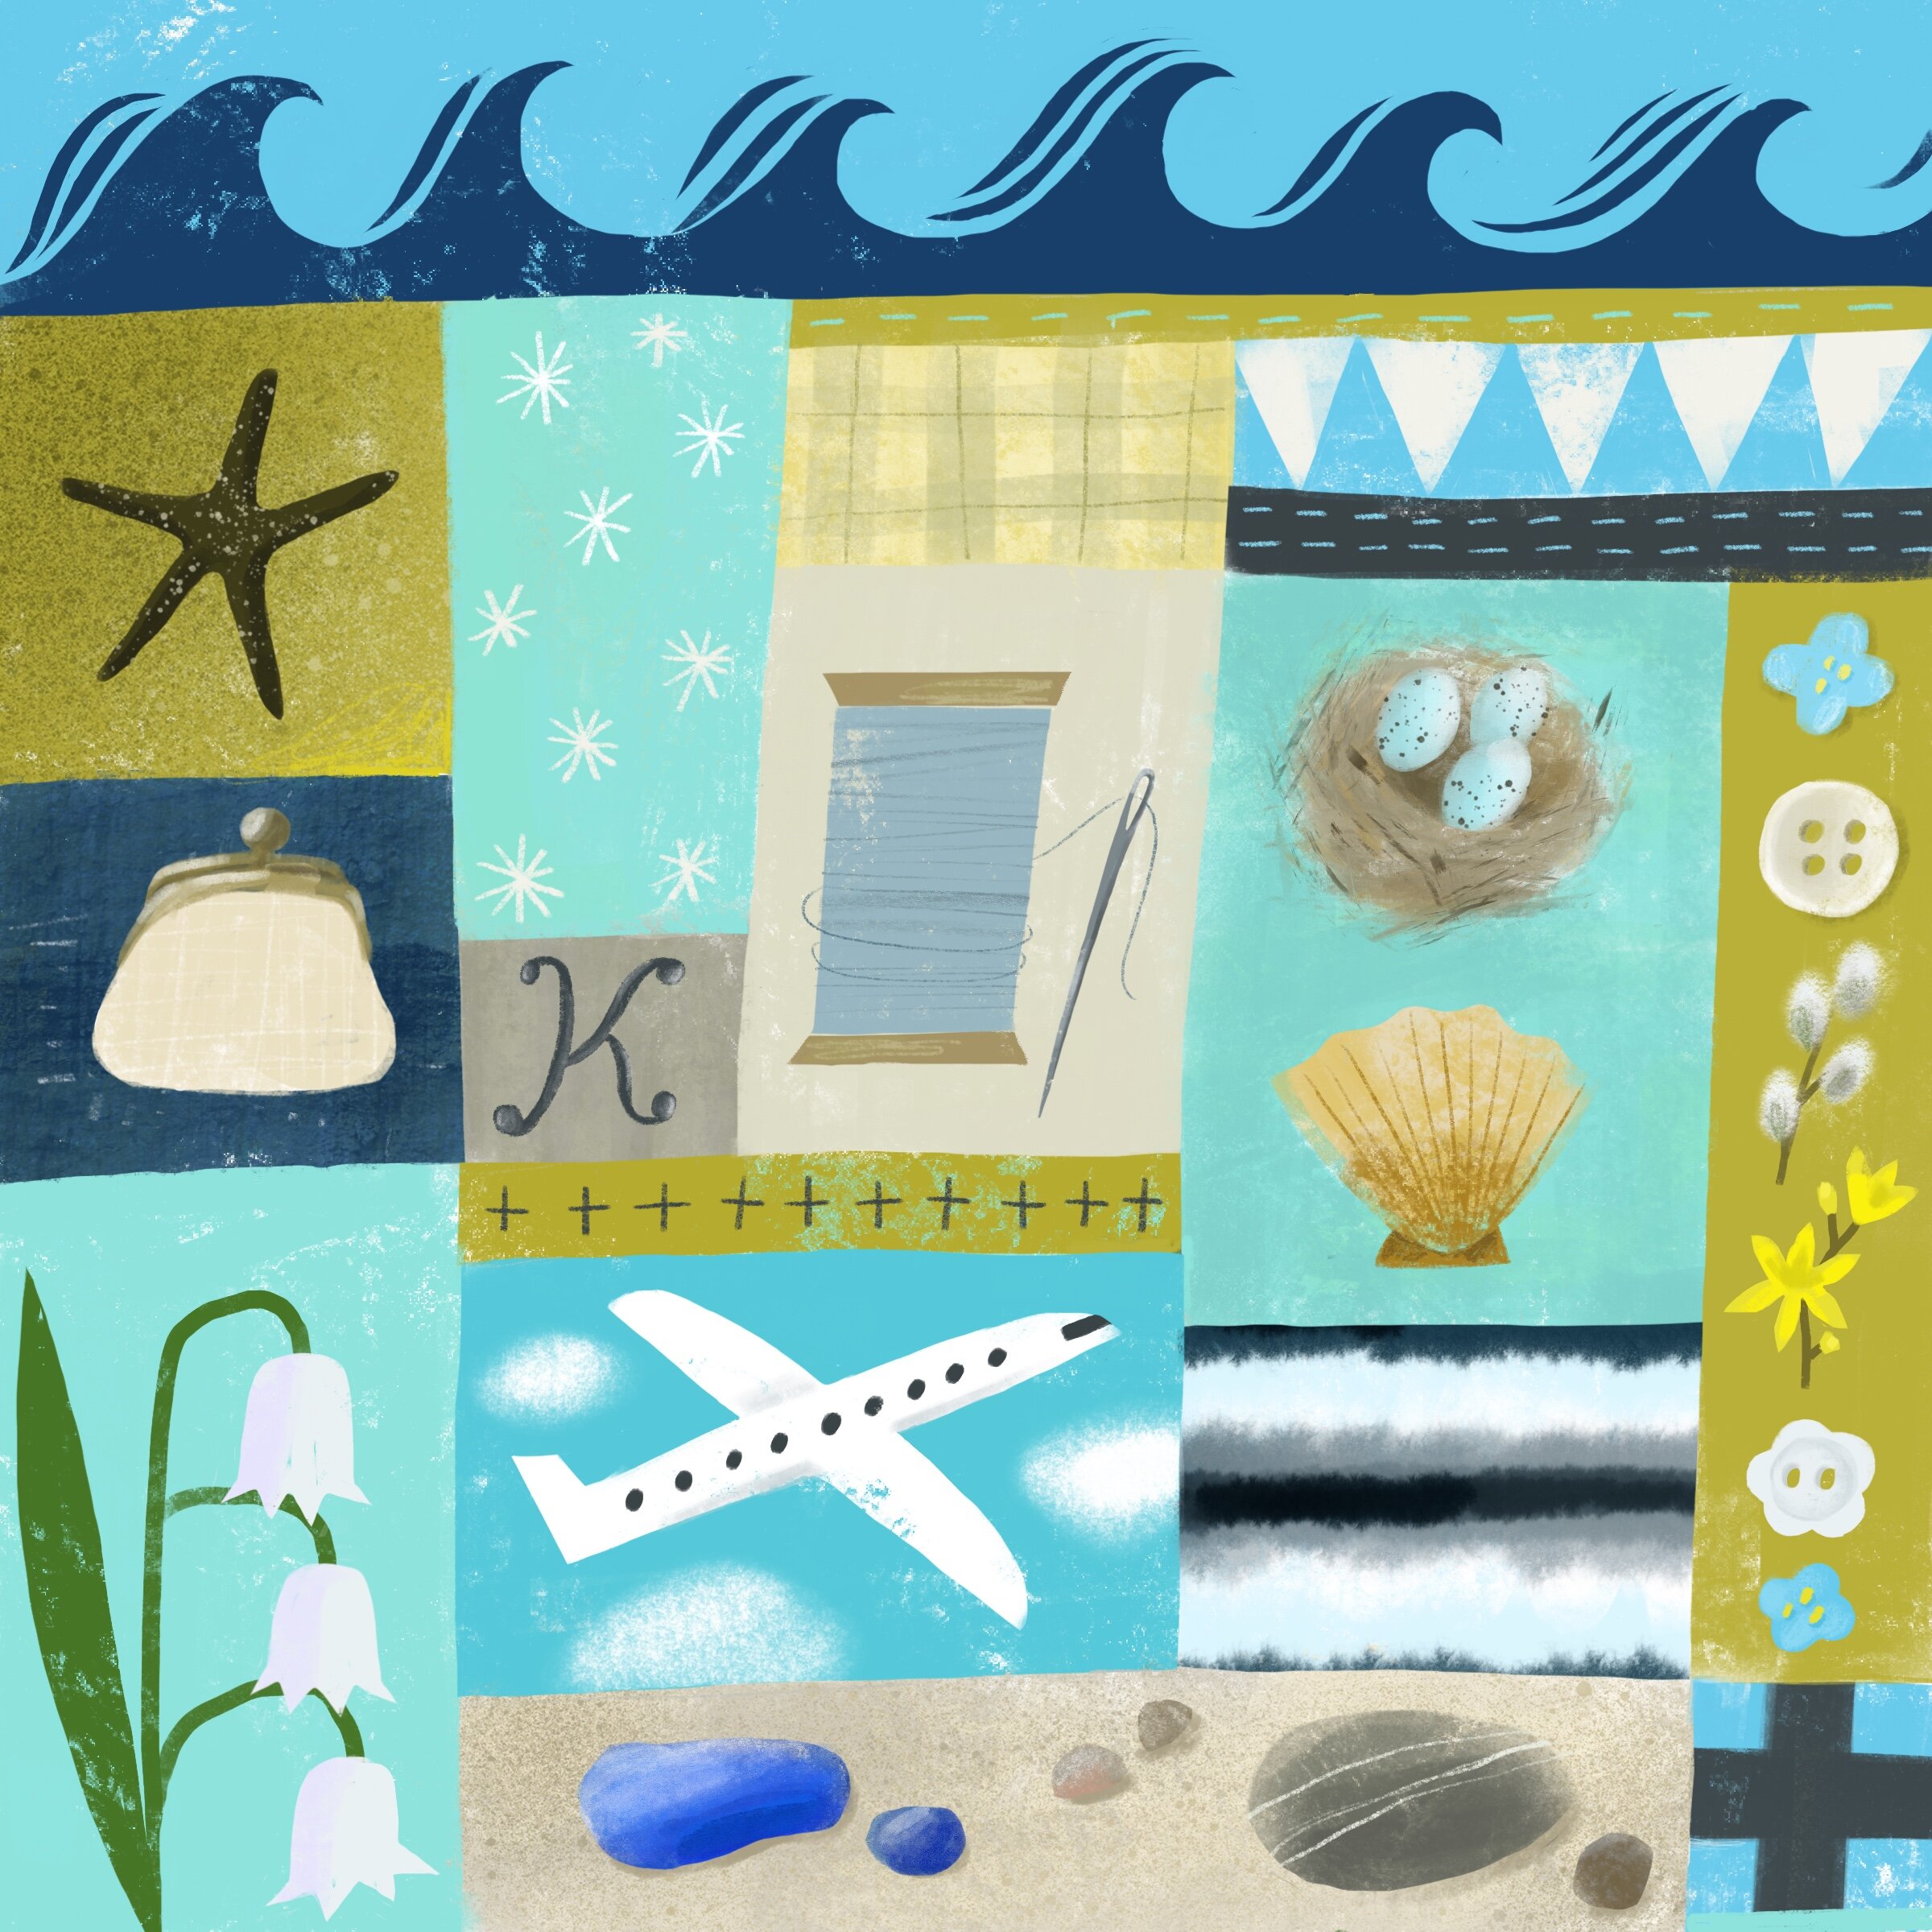
A gallery of my Grid Style Greetings
Here are some of the illustrations I’ve created for friends and family over the years. Each one truly celebrates the recipient. I had such a good time developing each idea and creating the finished illustration because it gave me lots of time to reminisce about the fun times we’ve had together!